
The freedom of exploring the world on two wheels shouldn't be limited by your bank account. Bikepacking—the art of self-supported cycling adventures with lightweight gear—has exploded in popularity, but the specialized equipment can quickly add up to hundreds or even thousands of dollars. The good news? You don't need top-shelf gear to have an incredible experience. This guide will show you how to start bikepacking on a budget, using creative solutions and smart planning to keep costs down while maximizing adventure.

Why Bikepacking is Perfect for Budget Adventurers
Bikepacking combines the freedom of cycling with the immersion of camping, creating a uniquely accessible adventure format. Unlike many outdoor pursuits that require expensive equipment or fees, bikepacking can be approached with minimal investment, especially for your first trips.
The Budget-Friendly Benefits
- No fuel costs—powered by you and maybe some snacks
- Free or low-cost camping options in many areas
- Use gear you already own with simple modifications
- Start with short overnight trips close to home
- Gradual investment as your interest grows

Budget Mindset: Approaching bikepacking with a budget mindset isn't just about saving money—it's about simplifying, being resourceful, and focusing on the experience rather than the gear. Some of the most memorable adventures happen with the simplest setups.
Your Bike: Use What You Have
The most budget-friendly bikepacking bike is the one already in your garage. Almost any bike—mountain, gravel, hybrid, or even a sturdy road bike—can be adapted for bikepacking with a few simple modifications.
Making Your Current Bike Bikepacking-Ready
- Check your tire clearance - Wider tires (if your frame allows) provide more comfort and stability on rough terrain
- Adjust your gearing - If possible, ensure you have low enough gears for climbing with a loaded bike
- Add water bottle cages - Use electrical tape to add extra cages to your fork or downtube
- Service your bike - Ensure it's in good working order before heading out

"The best bikepacking bike is the one that gets you out there. I started with my old hardtail mountain bike and some bungee cords—three years later, I've bikepacked across two countries and still use much of the same setup."
If You're Shopping for a Bike
If you don't have a suitable bike or are looking to upgrade, consider these budget-friendly options:
Used Hardtail Mountain Bikes

Look for older models with chromoly steel frames. They're durable, comfortable, and often have plenty of mounting points.
Budget range: $200-400 used
90s Rigid MTBs

These bombproof bikes from the 90s make excellent bikepacking rigs with their steel frames and ample tire clearance.
Budget range: $100-250 used
Budget Gravel Bikes

Entry-level gravel bikes offer versatility for mixed-terrain riding and usually have mounting points for accessories.
Budget range: $500-800 new
Need Help Finding a Used Bike?
Check out our free guide to evaluating used bikes for bikepacking. It includes a checklist of what to look for and common issues to avoid.
Download Free ChecklistBudget-Friendly Bikepacking Bags
Specialized bikepacking bags can be one of the biggest expenses when starting out. Here are affordable alternatives that work just as well for your first adventures:
DIY and Budget Bag Solutions

Handlebar Bag
A 10-20L waterproof dry bag ($15-25) secured to your handlebars with two webbing straps or Voile straps ($5-15) creates a perfect space for your sleeping bag and pad.
Seat Pack
A 5-10L dry bag ($10-20) strapped to your seatpost and saddle rails holds clothes and other soft items. For better stability, pack something firm at the bottom of the bag.
Frame Bag Alternatives

Use a small backpack or hydration pack ($20-40) secured within your frame triangle. This provides easy access to snacks, tools, and other essentials.
Stem Bag
An insulated water bottle holder ($5-10) attached to your stem and handlebars makes a perfect feed bag for snacks, your phone, or a small camera.
Adding Capacity
Electrical tape or pipe clamps ($2-5) can be used to add bottle cages to your fork legs or under your downtube for extra water or storage capacity.
Budget Bag Shopping Tips
- Check army surplus stores for durable, waterproof dry bags at discount prices
- Look for sales on outdoor gear at the end of the season
- Join online bikepacking communities where members often sell used gear
- Consider multi-purpose items (like a backpack that can also serve as a frame bag)
DIY Bikepacking Bag Tutorial
With basic sewing skills, you can make your own custom frame bag for under $30 in materials:

Creating a custom frame bag with basic materials can save you $50-100 compared to commercial options
Ready-Made Budget Options
If DIY isn't your thing, there are affordable bikepacking bag options under $50 each:
Shop Budget BagsBudget Sleep System: Rest Well for Less
A good night's sleep is crucial for enjoying your bikepacking adventure. Fortunately, you can create a comfortable sleep system without spending hundreds on ultralight gear.
Check our sleeping guide here
Sleeping Bag

Budget Options:
- Military surplus sleeping bags ($20-40)
- Entry-level 3-season bags from brands like Snugpak ($35-60)
- Warm weather option: Fleece sleeping bag liner + emergency bivvy ($15-25 total)
Money-saving tip: In summer, a sleeping bag liner paired with a light blanket often works fine.
Sleeping Pad

Budget Options:
- Foam sleeping pad ($15-25)
- Basic inflatable pad ($25-45)
- Military surplus sleeping mat ($20)
Money-saving tip: Foam yoga mats can be cut to torso length for a super-budget option.
Shelter

Budget Options:
- Military surplus bivvy bag ($30-40)
- Basic tarp ($15-30)
- Budget 1-person tent ($50-80)
Money-saving tip: A military poncho can double as rain gear and a shelter.
"I've used a $30 army surplus bivvy bag for three years of bikepacking. It's heavier than the fancy options, but it's bombproof and has kept me dry through some serious downpours."
Complete Budget Sleep System Example
| Item | Budget Option | Price | Weight | Notes |
| Sleeping Bag | Snugpak Travelpak 3 | $45 | 1.8kg | Comfort rating to 5°C/41°F |
| Sleeping Pad | Decathlon Forclaz Trek 100 | $25 | 410g | Self-inflating, compact |
| Shelter | British Army Gore-Tex Bivvy | $35 | 800g | Waterproof, durable |
| Tarp (optional) | Military Basha/Poncho | $20 | 500g | Doubles as rain gear |
| TOTAL | $125 | 3.5kg | Complete system |
Weather Considerations: Always check the forecast before heading out with a budget sleep system. While these options work well in many conditions, extreme weather may require more specialized gear. Start with fair-weather trips as you build your kit.
Budget Cooking and Eating
Food is one area where you can save significantly without compromising your experience. With some planning and creativity, you can eat well on the trail without expensive freeze-dried meals or specialized cooking equipment.
Budget Cooking Setup
- Stove: Canister stove ($15-30) or alcohol stove ($0-15 if DIY)
- Cookware: Aluminum pot from thrift store ($3-5) or military mess kit ($5-10)
- Utensils: Spoon from your kitchen (free) or plastic spork ($1-3)
- Mug: Repurposed tin can with handle ($0) or plastic cup ($1-3)
Total cooking setup cost: $20-50

Money-Saving Food Tips
- Pre-cook and pack meals that only need reheating
- Use quick-cooking foods like couscous, instant rice, and ramen
- Carry calorie-dense foods like nuts, dried fruit, and chocolate
- Plan routes through towns for resupply to carry less
- Repackage store-bought foods into reusable containers
"I make my own dehydrated meals at home for about $2-3 per meal, compared to $8-12 for commercial freeze-dried options. They taste better too!"
Budget-Friendly Meal Ideas
Breakfast

- Instant oatmeal with dried fruit and nuts ($0.50-1.00)
- Tortillas with peanut butter and honey ($0.75-1.25)
- Instant coffee or tea bags ($0.25-0.50)
Average cost: $1-2 per breakfast
Lunch & Snacks

- Tortillas with hard cheese and salami ($1.50-2.50)
- Tuna or chicken packets with crackers ($2.00-3.00)
- Trail mix, energy bars, and dried fruit ($1.50-3.00)
Average cost: $5-8 per day for lunch and snacks
Dinner
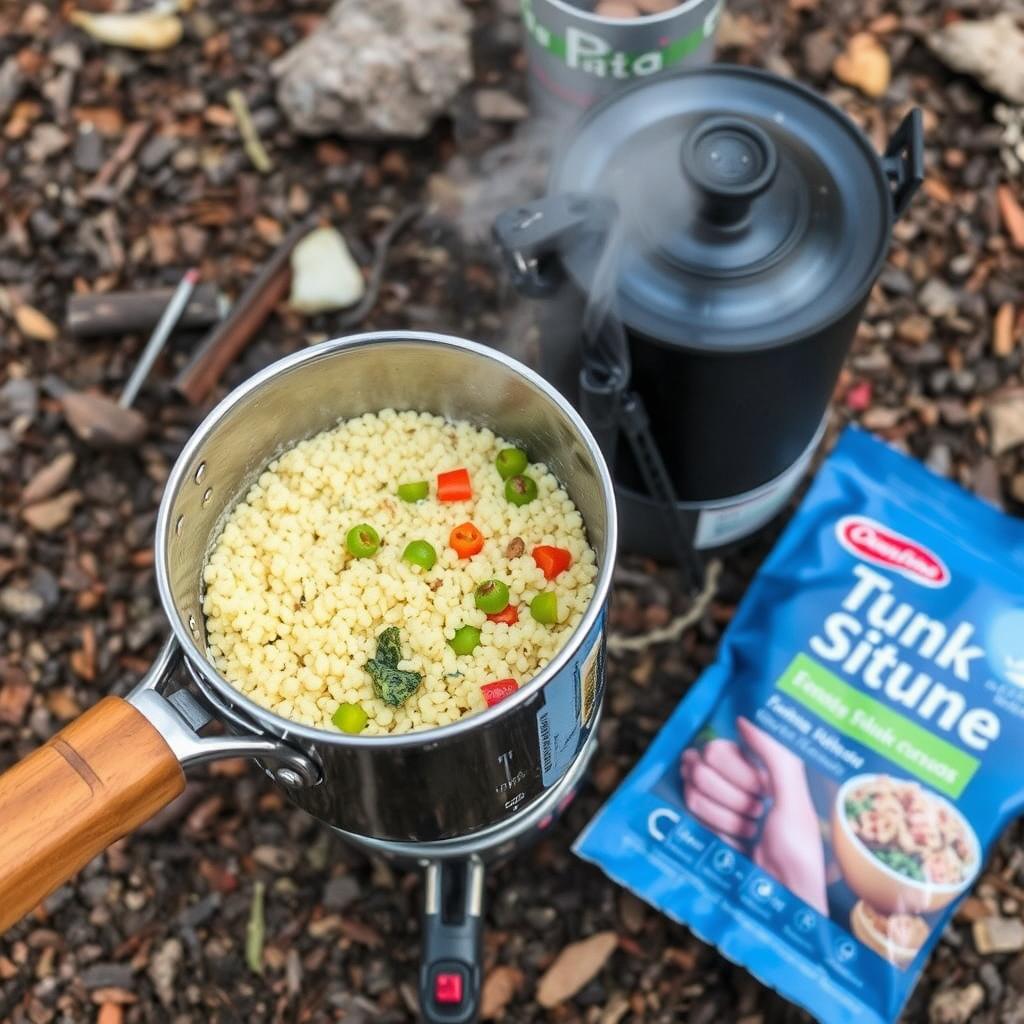
- Couscous with tuna and olive oil ($2.00-3.00)
- Instant rice with foil-pack Indian food ($2.50-4.00)
- Ramen upgraded with dehydrated vegetables and jerky ($1.50-2.50)
Average cost: $2-4 per dinner
Free Budget Meal Planning Guide
Download our free guide with 20 budget-friendly bikepacking recipes, a meal planning template, and a grocery shopping list.
Get Free Meal GuideBudget-Friendly Route Planning
Smart route planning is one of the best ways to keep your bikepacking adventure affordable. By choosing the right routes and planning logistics carefully, you can minimize expenses while maximizing enjoyment.
Money-Saving Route Strategies
- Start local - Explore areas within riding distance of your home to eliminate transportation costs
- Plan loops - Circular routes eliminate the need for shuttles or return transportation
- Research free camping - National Forests, BLM land, and dispersed camping areas offer free legal camping
- Strategic resupply - Plan food resupply at affordable grocery stores rather than expensive convenience stores
- Water sources - Map reliable water sources to carry less weight (and purify when necessary)

Free Route Planning Resources
- RideWithGPS - Free route planning with basic features
- Komoot - First region is free, good for route planning
- Bikepacking.com Routes - Free curated routes worldwide
- OpenStreetMap - Free mapping data
Offline Maps Tip
Download free offline maps before your trip to save phone battery and ensure navigation even without cell service. Apps like Maps.me and OsmAnd offer free offline map downloads.
Budget-Friendly First Bikepacking Routes
The S24O (Sub-24 Hour Overnight)
The perfect starter trip: ride out after work, camp, and return the next day. Find a camping spot 15-30 miles from home for an easy introduction to bikepacking.Budget benefits: No transportation costs, minimal food needs, easy to abort if problems arise
Rail Trails and Bike Paths

Converted rail corridors offer gentle grades and often connect towns for easy resupply. Many have free or cheap camping options nearby.
Budget benefits: Easy terrain requires less specialized gear, frequent access to affordable services
National Forest Loops

U.S. National Forests typically allow free dispersed camping and have extensive forest road networks perfect for bikepacking.
Budget benefits: Free legal camping, often accessible by public transportation
Example of a budget-friendly bikepacking loop with free camping options (illustrative only)
Budget Bike Maintenance Hacks
Keeping your bike in good working order doesn't have to be expensive. With some basic knowledge and a few essential tools, you can handle most maintenance tasks yourself and avoid costly shop visits.
Essential Budget Tool Kit
- Multi-tool with hex keys and screwdrivers ($10-20)
- Tire levers and patch kit ($5-10)
- Portable pump ($15-25)
- Chain lube ($5-10)
- Zip ties and duct tape ($3-5)
Total tool kit cost: $38-70

DIY Maintenance Skills Worth Learning
- Fixing a flat tire and patching tubes
- Adjusting brake pads and cable tension
- Cleaning and lubricating your chain
- Adjusting derailleur alignment
- Truing a wheel (basic adjustments)
"Learning to do my own basic bike maintenance has saved me hundreds of dollars over the years. Plus, being able to fix things on the trail has saved several trips from disaster."
Creative Repair Solutions
Tire Boots

Use an energy bar wrapper, a dollar bill, or a piece of old tire as a "boot" to repair a cut tire sidewall in an emergency.
Savings: $5-10 per repair vs. new tire
Spoke Replacement

Carry a few spare spokes, or in a pinch, use zip ties to temporarily replace a broken spoke until you reach civilization.
Savings: $15-30 vs. emergency shop visit
Chain Repair

Learn to use a chain tool to remove damaged links. In extreme cases, a shortened chain can still get you home (with limited gearing).
Savings: $20-40 vs. new chain + labor
Maintenance Tip: Always thoroughly check your bike before a trip. Preventive maintenance is much cheaper than emergency repairs or having to abort a trip due to mechanical issues.
Learn Basic Bike Maintenance
Check out these free resources to learn essential bike maintenance skills:
Park Tool Repair GuidesReal-Life Budget Bikepacking Success Stories
Need inspiration? Here are real examples of successful bikepacking trips done on minimal budgets, proving you don't need expensive gear to have an amazing adventure.

Mark's Weekend Warrior Setup
Mark used his 10-year-old hardtail mountain bike for a 2-day, 100-mile trip through state forest roads. His entire setup cost less than $200, most of which he already owned.
Gear Breakdown:
- Bike: Used Trek hardtail (already owned)
- Bags: Dry bags strapped to handlebars and seatpost ($30)
- Sleep system: Summer sleeping bag ($40), foam pad ($15), tarp ($20)
- Cooking: Small canister stove ($25), aluminum pot ($5)
- Food: Oatmeal, tortillas, tuna packets, trail mix ($25 total)
Total new purchases: $160
"I was amazed at how well this simple setup worked. The trip was just as enjoyable as when I've gone with friends who had much more expensive gear."

Lisa's Week-Long Adventure
Lisa completed a 350-mile rail trail route using a vintage steel mountain bike she bought for $120. Her entire setup, including the bike, cost under $400.
Gear Breakdown:
- Bike: 1990s Specialized Rockhopper ($120 used)
- Bags: DIY frame bag ($25 in materials), handlebar roll ($15), small backpack (already owned)
- Sleep system: Budget 3-season sleeping bag ($60), inflatable pad ($35), small tent ($80)
- Cooking: Alcohol stove ($0 - made from soda can), pot ($5 thrift store)
- Food: Mix of camp cooking and town meals ($120 for the week)
Total cost: $460 including food and bike
"The old steel bike was actually perfect for bikepacking—comfortable, durable, and with plenty of mounting points. I've since done three more trips with the same setup."
"The best thing about bikepacking on a budget is that it forces you to be creative and focus on what really matters—the experience itself. Some of my most memorable trips have been with the simplest gear."
Community Resources for Budget Bikepackers
The bikepacking community is incredibly supportive and full of resources for those looking to adventure on a budget. Here are some of the best places to find information, gear deals, and like-minded riders.
Online Communities

- r/bikepacking - Active subreddit with budget-friendly advice
- Bikepacking.net Forum - Dedicated forum with DIY section
- Bikepacking.com Facebook Group - Large community with gear discussions
These communities are great for asking specific questions about budget gear options and finding trip partners.
Gear Resources

- Make Your Own Bikepacking Gear (MYOBG) - DIY tutorials
- GearTrade - Used outdoor gear marketplace
- REI Used Gear - Discounted returned items
- Local bike co-ops - Tools, parts, and knowledge
Second-hand gear can save you 40-70% compared to buying new.
Route Planning

- Bikepacking.com Routes - Free curated routes
- Adventure Cycling Association - Some free routes
- Trailforks - Free trail database
- Local bike shops - Often have free local route knowledge
Many libraries also offer free access to maps and guidebooks.
Join the Budget Bikepacking Community
Connect with other budget-minded bikepackers, share tips, and find riding partners in your area.
Join r/bikepackingStart Your Budget Bikepacking Adventure
Bikepacking on a budget isn't just about saving money—it's about embracing a simpler, more resourceful approach to adventure. Some of the most memorable experiences come from trips with minimal gear and maximum creativity.
Key Takeaways
- Use what you have—your current bike and camping gear can likely work for your first trips
- Start small with overnight trips close to home before investing in specialized gear
- Focus on the essentials: shelter, sleep, food, and basic tools
- Learn basic maintenance skills to avoid costly repairs
- Connect with the bikepacking community for advice and used gear options
"The beauty of bikepacking is that it's accessible to almost anyone with a bike and a sense of adventure. Don't let gear costs keep you from experiencing the freedom of exploring on two wheels."

Ready to Plan Your First Trip?
Download our free Budget Bikepacking Starter Guide with checklists, route planning templates, and meal ideas.
Get Your Free GuideRemember, the most important thing isn't having the perfect gear—it's getting out there and experiencing the adventure. Start with what you have, learn as you go, and upgrade only when necessary. The open road is waiting, and it doesn't care how much your setup cost.
Happy trails and budget-friendly adventures!


